Tear Out:
This is the first phase of the process. Depending on what you currently have in your area, you will need to tear out everything and get it to bare dirt to get it ready for the soil preparation phase. If you have existing grass in the area you can rent a sod cutter from your local Home Depot or Lowes to make the removal easier to complete. If you have an abundance of weeds you may want to treat them to kill them off to avoid the weeds from coming back during the 3 week establishment period. All the weeds will need to be removed prior to soil preparation. It is not recommended to rototill the weeds into the existing soil. This could result in the weeds coming back during the establishment period. If the weeds are treated, keep in mind you do not want to start the rest of the installation process until 10-14 days after treatment.
Soil Preparation:
Once the area has been torn out of all other material and is at bare dirt, the soil must prepared correctly. Please note, proper soil preparation is the most important part of the whole process. Poorly or improperly prepared soil could reduce your chances of having success with the sod. We recommend a minimum of 3-4 yards of compost be rototilled into your existing soil 4-6 inches deep. Keep in mind that the addition of 3 yards of compost will raise your soil level a full inch, so be sure you account for that inch when deciding where you want your sod to land. Once you have the area rototilled, rake the area level to the existing grade and you are ready to start the sod installation.
Sod Installation:
Green side up!
Sod is a living plant and should be installed as soon as possible after delivery.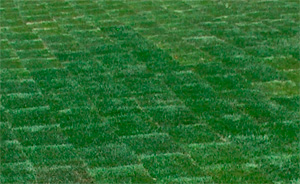
When installing the sod, start from an area furthest from where your material is stored and work your way back to it. This will prevent you from working over the area that has already been installed. If you have a big area you may want to put a little water on the area installed to avoid it drying out. Lay the sod in a brick pattern as you install it. You want your seams to be alternating instead of them all lined up. This will avoid water drainage channels as a result of all your seams lining up. You’ll need a sod knife to cut the sod to the correct size and dimension. Always cut the sod on the dirt side. This will make the cut easier.
Watch The Sod Guy install sod in a front yard using time lapse video. This will demonstrate each process described above.